Wifi is a super convenient way to use the internet with your laptop but Wifi connection issues can make things incredibly frustrating. Common problems include not seeing the Wi-Fi network, not being able to see the wireless icon on your taskbar, or the ‘can’t connect to this network’ message.
To fix a Wifi connect on a laptop you should reset the Wifi adapter, restore advanced internet settings, run the network troubleshooter, perform a full network reset, restart Windows Explorer, check Windows Services, or forget all of your wireless networks. Moving from one step to the next, one-by-one, will fix your internet connection issues!
Read on to get more information about each step along with pictures and helpful tips!
7 Ways to fix the Wifi connection on your Windows 10 laptop
Today we are going to tackle a common laptop problem – Wifi connection issues. Unfortunately, this is a probably that can have a huge number of reasons and, as such, a huge number of potential solutions.
But don’t worry – we’ll solve it together!
I do all my tutorials by starting with the easiest, quickest, and most likely causes and then working my way down to the less likely, more time-consuming, and more technical solutions. This way, you will probably fix your problem fairly quickly, but if you still have an issue, you can always move on to the next step to try that one.
Based on the feedback and comments that I’ve gotten on my YouTube video for this problem, it really looks like none of these fixes is the most common – every fix gets a lot of comments that it fixed the viewer’s problem!
If you would prefer to watch this tutorial, here is the full video from my YouTube channel:
Before you start – Check the Wifi button
Before we get too deep into the tutorial, I want you to check something for me first.
Depending on your laptop, you should have a little Wifi button somewhere on your keyboard. It might be buried in a function key, it might have a little Wifi symbol on it.
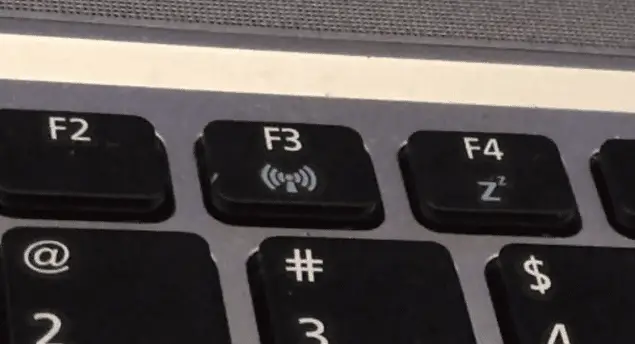
It might even be a little toggle or switch on the side of your laptop.
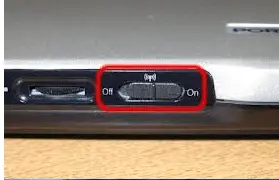
Whichever version of this key/button you have, make sure that you check to ensure that your Wifi is, in fact, TURNED ON!
So many people comment that this ended up fixing their problem, and they feel a little foolish after realizing that their internet was basically just turned off. Don’t feel bad. Just toggle it on, make a note for the future, and use your internet!
Also, check to make sure that your laptop isn’t in airplane mode which is a common feature these days. There might be a button on your keyboard but you can also check the Windows setting by clicking the internet icon on your taskbar and ensuring that ‘Airplane mode’ isn’t highlighted in blue.
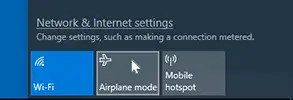
So, Wifi should be BLUE and airplane mode should be GREY.
The LAST thing I want you to do before we go to the fixes is to both restart your laptop as well as the internet router in your home (if you have access to that).
Now that we’ve checked to make sure the Wifi wasn’t turned off, your laptop isn’t in airplane mode, and that you’ve restarted your laptop and router, it’s time for the first actual fix.
Fix #1 – Reset the Wifi Adapter
Ok, now for the first real fix.
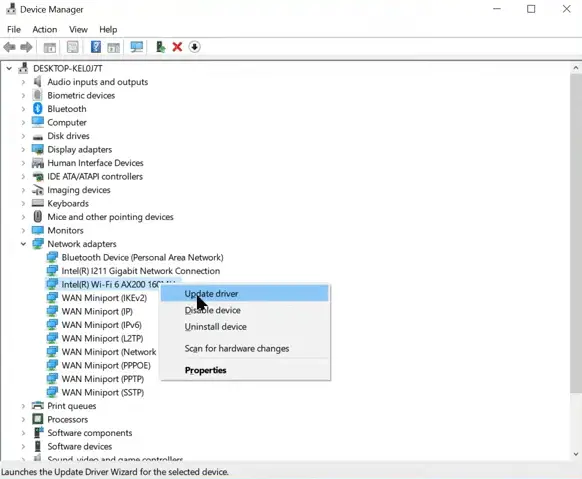
We want to make sure that the actual Wifi adapter ‘device’ is available in Windows and is working properly. To check this, we’ll right click on the Windows logo and then click on ‘Device Manager.’
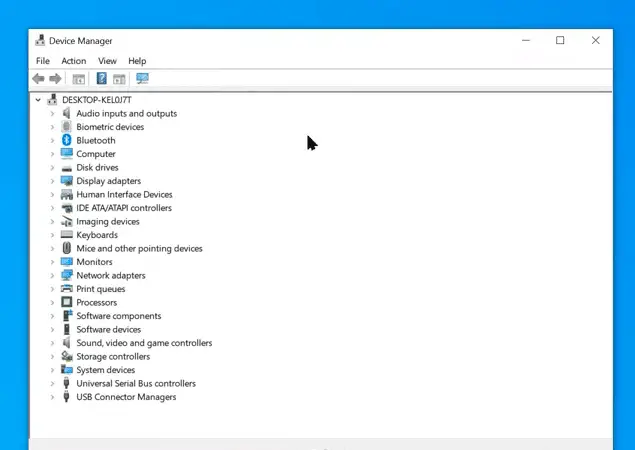
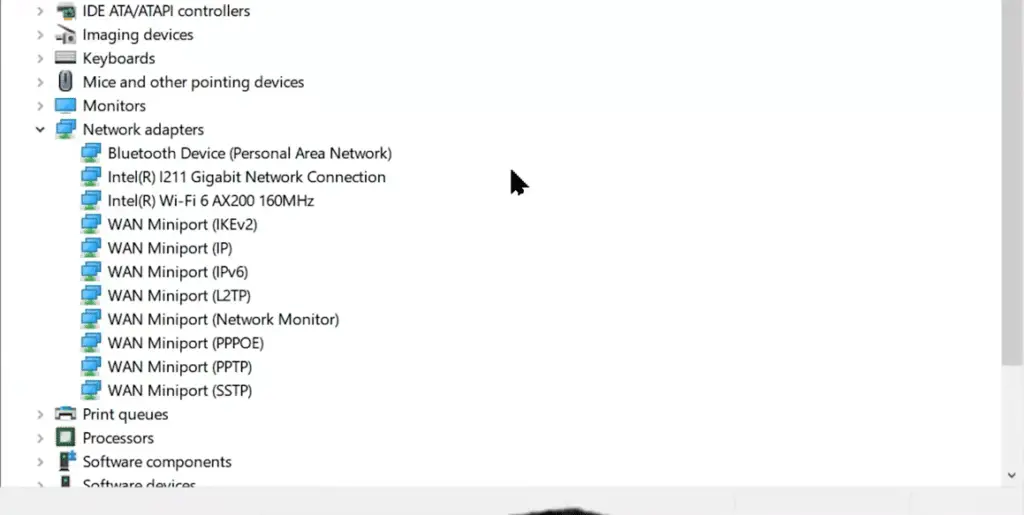
Once you’re here, click on the ‘Network Adapter’ to open up the device list for that category of device.
What you see here will depend on your system and setup, but generally you should see a list that includes Miniports, Bluetooth Device, Gigabit Network, and a Wi-Fi adapter.
As you can see in the picture below, I have an “Intel(R) Wi-Fi 6 AX200 160MHz” adapter. Since there is no red X on the little icon next to it, that generally means that the device is working properly.
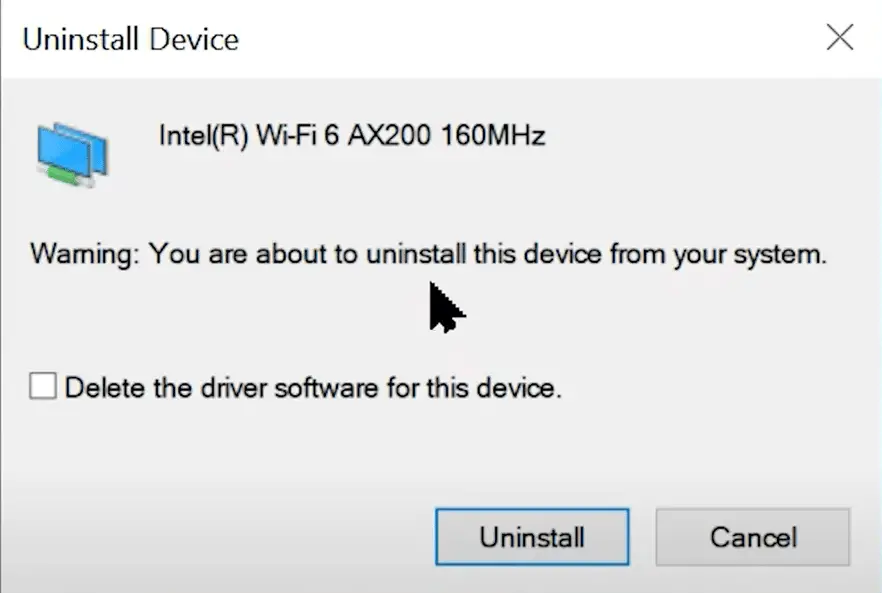
Right-click on that device and then select Uninstall device – don’t worry, it’s okay!
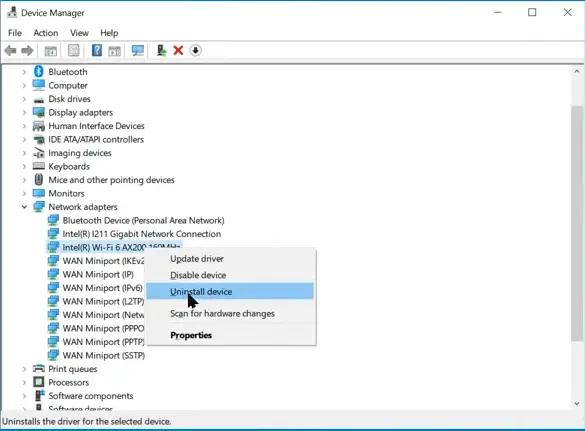
But, DON’T delete the driver software for this device (leave it unchecked)
Give your laptop a second, and you should see the adapter has disappeared from your device list.
Next, go up to the Device Manager menu, click on ‘Action,’ and then click on Scan for hardware changes.
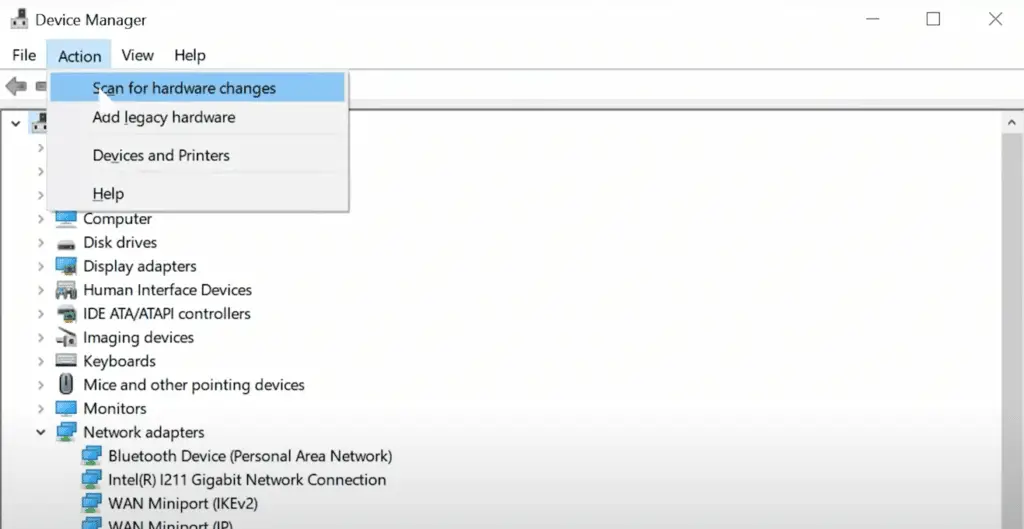
At this point, you should see the Wifi adapter pop back up in the device list.
If you didn’t see the Wifi icon on your taskbar before, check and see if you can see it now.
If you see your network, go ahead and try to connect. Keep in mind that uninstalling and reinstalling your adapter might make it forget your wireless network passwords, so be prepared to enter those passwords again!
If you STILL don’t see the wireless icon on the taskbar, we can try one more thing in this step.
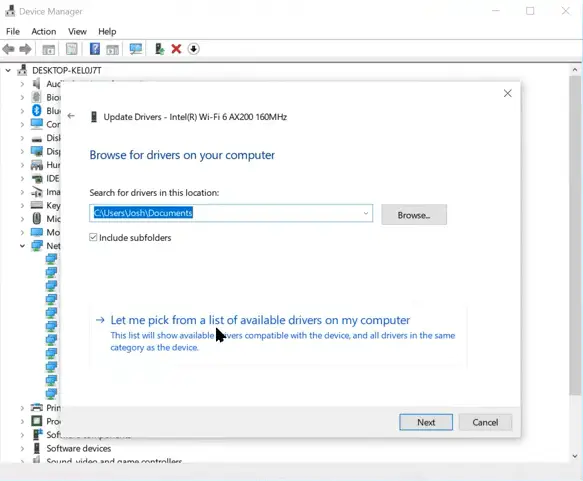
Go back to your device list and right-click on the Wifi adapter again. This time, click on ‘Update driver’ and in the next menu, click ‘Browse my computer for drivers.’
Then, select ‘Let me pick from a list of available drivers on my computer.’
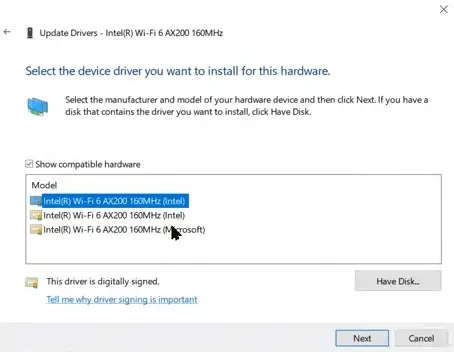
Next, you’ll see some list of drivers, maybe with dates, maybe without. If you don’t have any dates listed, choose one driver at a time to see if one of them fixes the problem.
At this point, your problem might be fixed completely. If it isn’t, hopefully you can at least see the Wifi icon on your taskbar and we can move on to the next step.
Fix #2 – Restore advanced internet settings
For this step, go to the Windows search bar and type “internet options’ to open up a control panel listing called ‘Internet Properties’ where you will see some settings.
Move to the ‘Advanced tab’ up top and then click on the ‘Restore advanced settings’ button near the bottom.

Give your laptop a second for the settings to take effect. Go ahead and restart your computer at this point to see if your problem is fixed.
If this fixed your problem, great! If not, continue reading!
Fix #3 – Run the network troubleshooter
In this step, we’ll run the network troubleshooter that is built in to Windows 10. Sometimes it actually troubleshoots!
In the Windows search bar, type in ‘Network and internet’ to bring up a control panel section.
Click on the big ‘Troubleshoot’ button and then leave the radio button on the ‘All network adapters’ option. Then, just hit next.
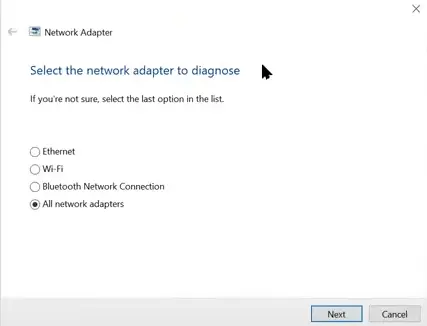
If it comes back to you with a problem, follow the recommended steps on screen to fix it. I also recommend fixing the problems as an Administrator to avoid any potential issues.
At this point, you might have a working Wifi connection – congrats!
If not, let’s move on to the next step.
Fix #4 – Full network reset
In this step, we’ll completely reset your network settings to the original factory settings.
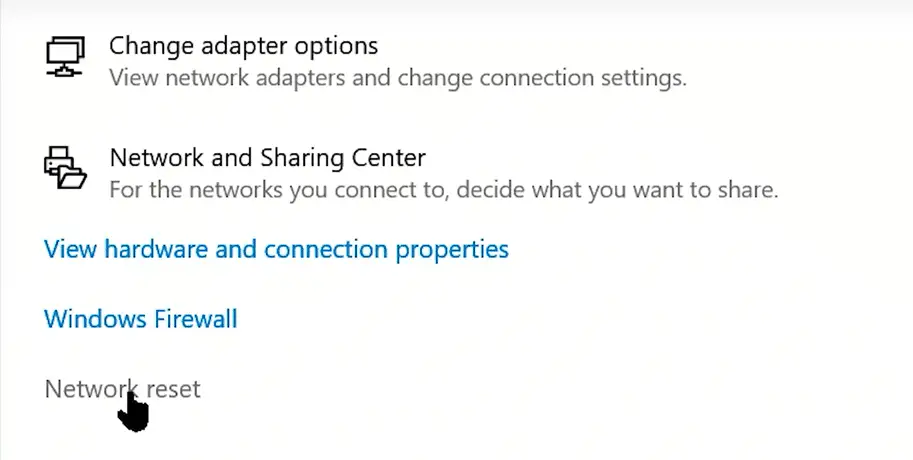
Go back to the ‘Network and Internet’ settings page that we were on before, but this time we are going to select ‘Network reset’ at the bottom of the page.
You’ll get a warning with more information when you click on it. Click ‘Reset now’ to reset. Then, click yes to confirm.
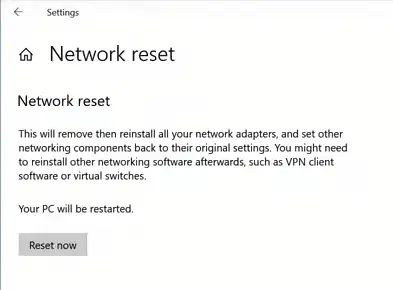
This process might take a few minutes, and your laptop should also automatically restart. Once your laptop restarts, check to see if your Wifi is working and whether or not you are able to connect to your network.
Hopefully, you’re all set! If not, keep reading!
Fix #5 – Restart Windows Explorer
In this step, we’ll restart Windows Explorer.
On your keyboard, press Ctrl, Alt, and Delete all at the same time to open up the task manager or go to the Windows search bar and search for ‘task manager.’
Once you get to the task manager, you should start on the ‘Processes’ tab. Scroll all the way down until you see the ‘Windows Explorer’ process.
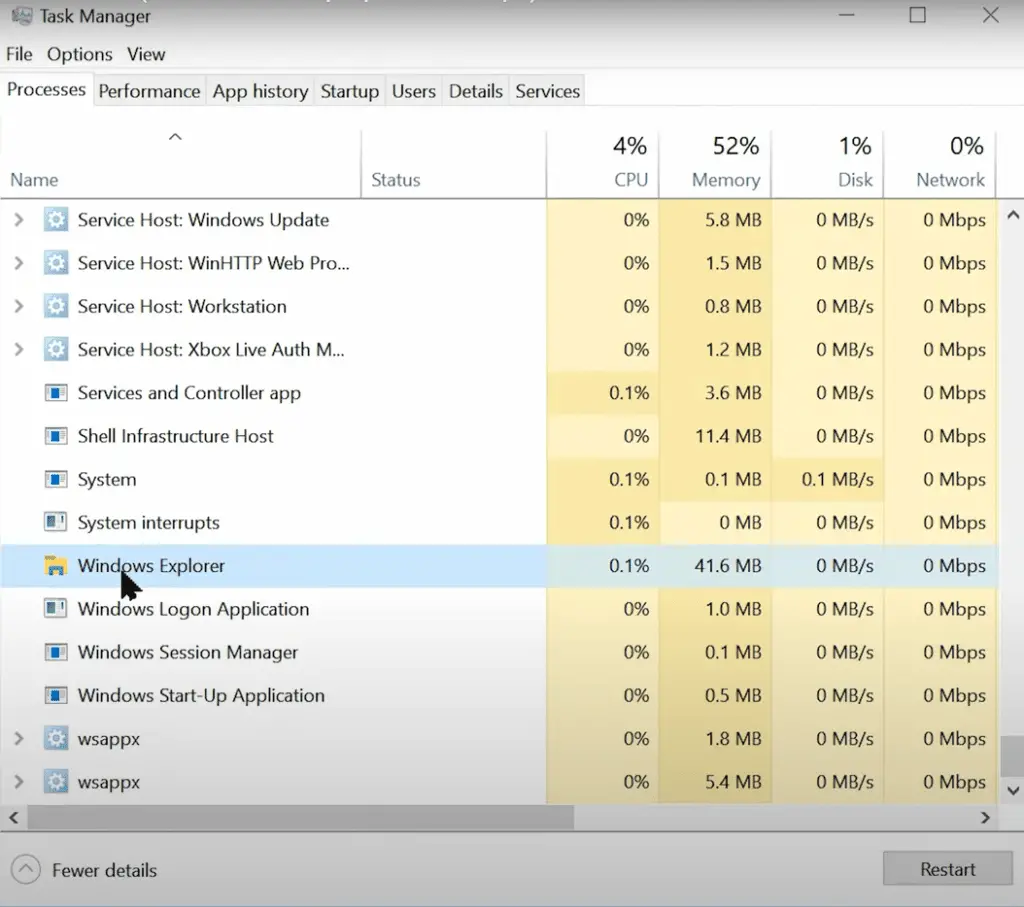
Right-click on it and then click on ‘Restart.’
Your screen might flicker or turn black briefly, which is normal. Once the screen comes back on, Windows Explorer has been restarted.
Check to see if your Wifi is working now!
If it is, great! If not, keep reading!
Fix #6 – Check Windows Services
In the sixth fix, we’ll stay in the task manager.
This time, however, we’ll move to the services tab up top and then click on ‘Open services’ at the bottom to expand the view.
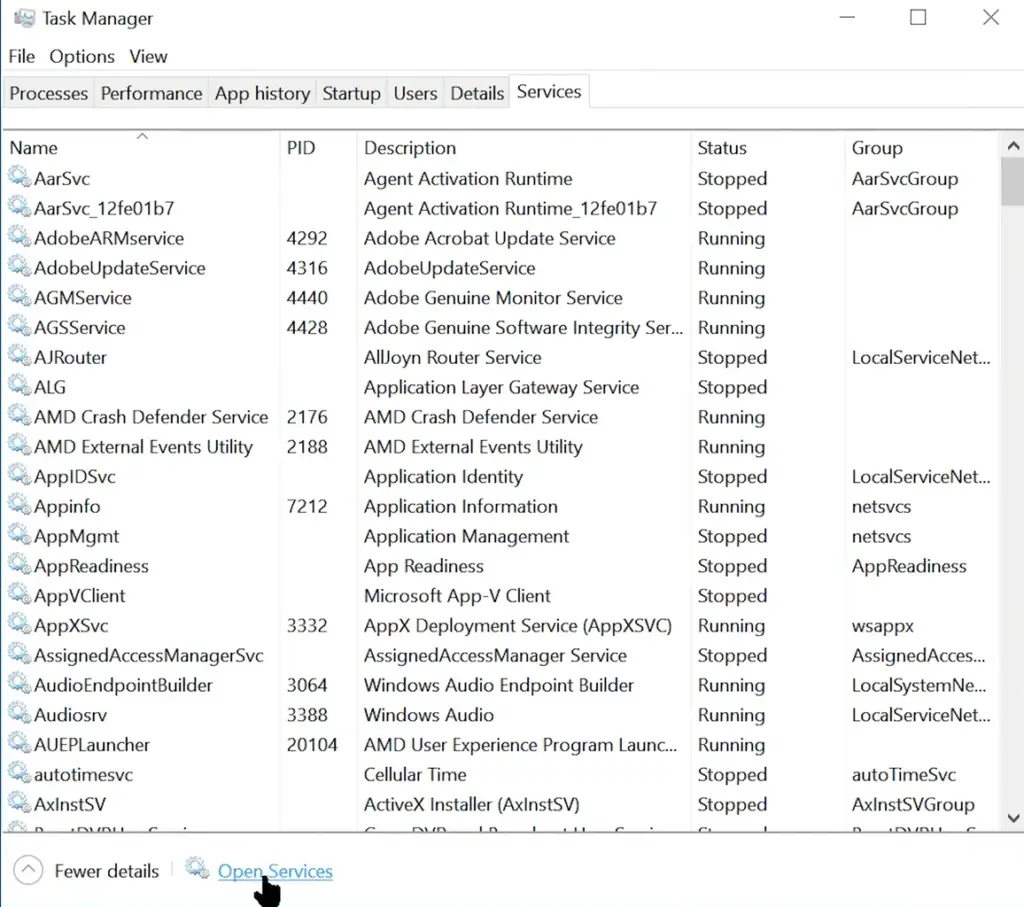
Scroll down until you see the DHCP Client listing.
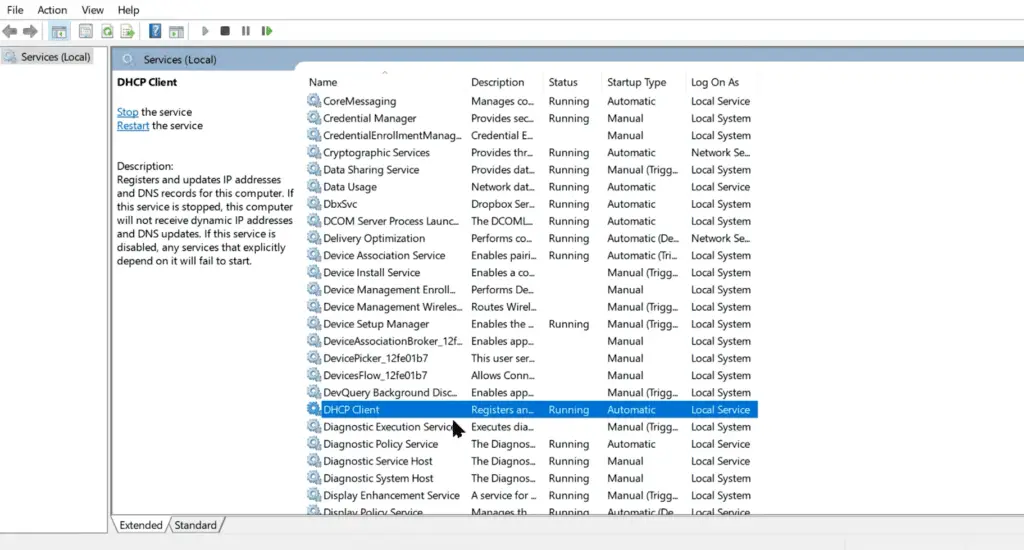
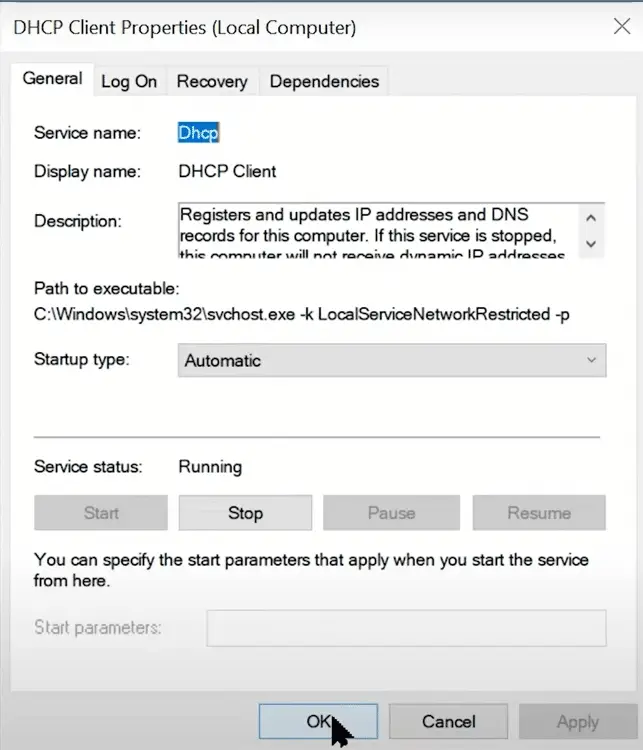
Under the status column, the DHCP Client listing should say ‘Running.’ If it doesn’t, right-click on it and click ‘Properties.’ where you can confirm that the startup type is ‘Automatic’ and then click Ok.
Next, find the WLAN AutoConfig listing in the services list.
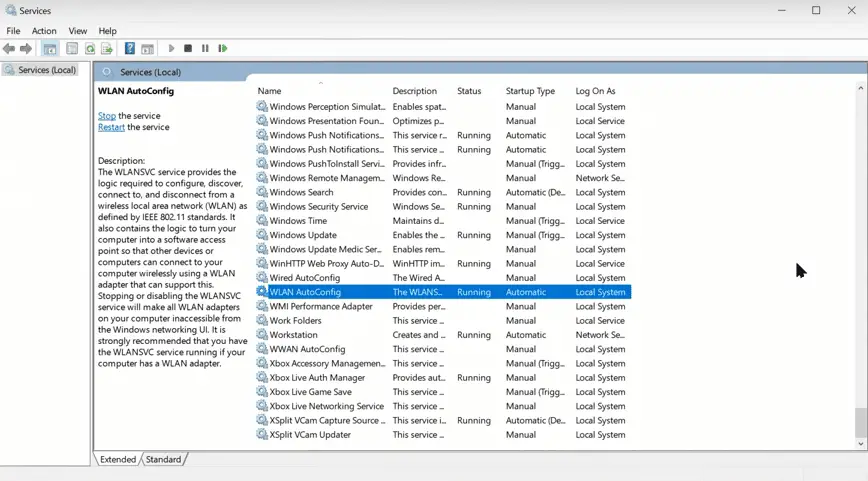
This service should also be running. If it isn’t, follow the same steps as we just followed for the DHCP Client.
Next, we’ll navigate to the Wi-Fi Direct Services Connection.
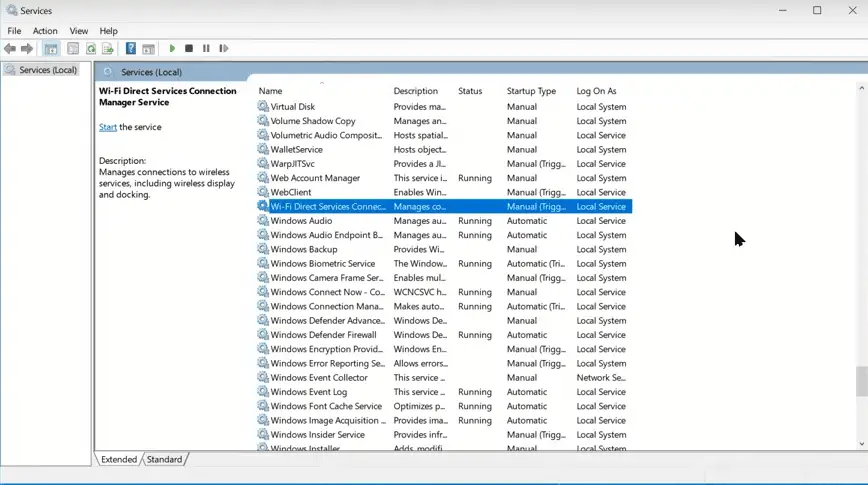
For this one, we want to make sure that the startup type is set to ‘Manual’ which you can do by right-clicking and going into properties.
At this point, check your Wi-fi again to see if its working!
If not, we have one more!
Fix #7 – Forget wireless networks
In this last fix, we’ll assume that you can see your wireless network icon, you can see your wireless network, and you may even be able to select it. But, you don’t have internet.
If this is you, simply right-click on your network in the list and then click on ‘forgot network’ to remove it.
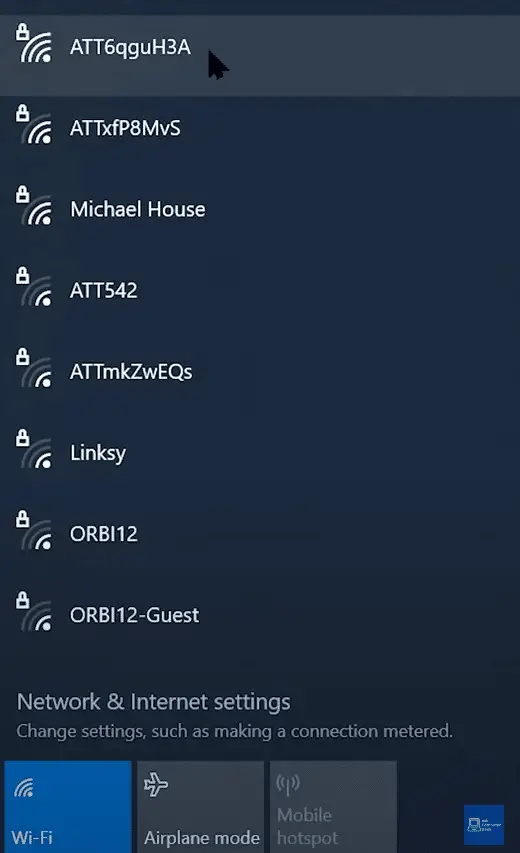
After you ‘forget’ the network, it should just pop right back up as an available connection, but it won’t connect automatically because you’ve cleared out the password in the last step.
Click on your network to connect, input the password, and connect to your internet!
I sure hope this problem is fixed for you!
